
A front-office uniform loses its intended value when colours drift, badges move, collars deform, or staff wear visibly damaged garments. By the end, you will have a practical system for inspecting, cleaning, repairing, replacing, and documenting reception uniforms without confusing a design flaw with poor upkeep.
Key takeaways
- Inspect fit, stains, loose trims and branding before every shift.
- Follow the care label for washing, drying, pressing and stain removal.
- Repair loose buttons and seams before damage affects the approved appearance.
- Replace garments when fading, distortion or repeated repairs change the design.
What design maintenance preserves beyond a smart appearance
A maintained front office uniform protects the approved cut, fit, colours, trims, branding and presentation standard throughout the garment’s service life. For a front office uniform, design maintenance benefits the hotel by keeping reception staff recognisable, preserving a controlled brand appearance and preventing one worn or altered garment from weakening the whole team’s presentation.
It also protects operational identification. Name badges, role insignia and embroidered logos must remain readable and in the approved position. Replacing a jacket without transferring or checking them can make an employee appear to hold a different role, while adhesive residue, stitch holes or a damaged logo area can permanently spoil the replacement.
Maintenance protects function as well as appearance. Collars, cuffs, trouser hems, pocket edges, buttons and zips receive repeated contact; neglect can turn a minor fault into an awkward failure during guest service. A hotel should record each garment’s issue date, wearer size, laundering route, repairs and replacement reason.
Those records distinguish fabric wear from poor fit, incorrect finishing, lost accessories or inadequate spare stock.
Set a retirement threshold instead of waiting until a garment “looks bad”:
- Permanent upper-torso stain
- Frayed or shiny cuffs
- Failed closure or stretched collar
- Colour loss visible beside current stock
- Branding that cannot be restored without changing the garment’s appearance
Adequate size-level spare stock prevents staff from wearing damaged pieces or mixing design generations while replacements are arranged.
The inspection schedule that keeps reception uniforms guest-ready
Use a written check sheet and assign each task to a named employee or supervisor. This makes front office uniform upkeep visible instead of leaving defects to guest complaints.
- Every shift, the employee checks the uniform in a mirror for stains, odour, wrinkles, loose threads, missing buttons, damaged zips, frayed hems, pilling, and deformed collars or cuffs. Confirm that the name badge, role insignia, and logo are readable and in their approved positions.
- Every day, the supervisor inspects uniforms after laundering and before issue. Record colour change, jacket-and-trouser shade mismatch, seam opening, detached embroidery, loose badges, damaged fasteners, and any defect that could worsen during guest contact.
- Every week, test high-contact points: collar and cuffs, jacket fronts, pocket edges, trouser hems, buttons, zippers, and badge attachment. Compare issued garments against the approved cut, trim scale, and fit; remove visibly damaged pieces from the desk immediately.
- Every month, reconcile jacket, shirt, and trouser stock against size-level par counts. Hold enough spares to prevent stained garments or mixed design generations returning to service, and record each repair, replacement, and retirement.
- Every season, review fading, fabric wear, fit changes, and recurring repairs across departments. Confirm that replacement specifications name the fabric composition, fabric weight, colour standard, buttons, trim, branding, label placement, and approved supplier. Keep ISO 3758 care symbols in the uniform-care file so laundry settings do not damage the design.
How to clean and finish each uniform component safely
Launder shirts after each wear, or sooner for sweat, food, makeup, or odour. Check the care label and the hotel’s laundering route; industrial washing is not equivalent to domestic washing, so ask whether the fabric was tested under ISO 15797 conditions used by your laundry.
1. Remove detachable name badges, role insignia, and metal accessories before washing or dry-cleaning. Reattach them in the approved position only after the garment is clean and fully dry; otherwise adhesive, stitch holes, or heat can damage the logo area.
2. Spot-treat a fresh spill on a shirt, jacket, trouser, or skirt before it sets. Test the treatment on an inside seam, blot rather than rub, and send tailored suiting for dry-cleaning when its care label requires it.
3. Steam jackets, trousers, skirts, scarves, and ties to release light wrinkles. Keep the steamer moving and away from heat-applied identification; concentrated heat can distort fusible interlinings or flatten fabric.
4. Press only when steaming cannot restore the finish. Follow the specified temperature, use a pressing cloth where instructed, and press synthetic or blended suiting inside out when required; direct heat can create permanent shine.
5. Replace a shirt, jacket, trouser, or skirt when laundering no longer removes staining, colour has changed, pilling is conspicuous, seams or fasteners keep failing, or the shape remains distorted. Inspect every cleaned piece before issue and record the route, defect, repair, and replacement reason as part of hotel reception uniform maintenance.
When repair is sensible—and when the uniform is the problem
Repair a uniform when the damage is local, the garment still fits, and the approved appearance can be restored. Treat the uniform as the problem when the same fault appears across several wearers, after correct laundering and finishing, or when alterations cannot correct the cut.
Set written appearance rules for:
- Approved colour, trim, badge position, and branding
- Acceptable wrinkle, pilling, fading, stain, and odour limits
- Collar, cuff, hem, button, and zip condition
- The point at which staff must remove a garment from service
Use a garment or batch record showing issue date, wearer size, laundering route, repair history, and replacement reason. Compare the record with ISO 3758 care symbols and the hotel’s finishing instructions; excessive heat or pressure can create shine, distort interlinings, or damage heat-applied identification.
If industrial laundering is used, ask whether the fabric was evaluated under ISO 15797 procedures.
Retire the garment when it has:
- A permanent stain on the upper torso
- Frayed or shiny cuffs
- A failed closure or stretched collar
- Colour loss visible beside current stock
- Branding that cannot be restored without changing its appearance
Normal wear develops gradually at high-contact areas. Poor fit shows as pulling across the chest, gaping, restricted movement, or trouser strain soon after issue. A faulty design repeats across sizes or departments, such as collars that collapse after correct finishing or pockets that pull open during routine work.
Keep size-level par counts for jackets, shirts, and trousers, plus spare badges and approved trims. Insufficient spares force staff to wear damaged garments or mix design generations, weakening the front desk uniform benefits of consistent recognition and presentation.
How to control replacements without losing design consistency
A replacement garment should be ordered from a controlled specification, not from a style name or a photograph. “Navy jacket” leaves room for different shades, sheen, lapel shapes, button sizes, and fits that become obvious beside the current reception stock.
1. Keep one approved sample and a written specification covering fabric composition, fabric weight, colour reference, lining, trim width, buttons, fasteners, label placement, embroidery artwork, logo size, and badge position.
2. Name the approved supplier and prohibit “similar” substitutions without written approval. Give BENZ UNIFORMS the master sample, measurement chart, embroidery file, and trim details when requesting repeat production.
3. Approve a pre-production sample against the retained garment. Check colour in reception lighting, fabric sheen, lapel roll, pocket position, button spacing, embroidery density, and sleeve and body measurements before authorising the batch.
4. Inspect deliveries by size and production lot. Compare a jacket, shirt, or trouser with current stock; quarantine pieces with a visible shade difference, altered trim, incorrect branding, or changed proportions.
5. Record each employee’s approved measurements and keep size-level par counts for jackets, shirts, trousers, and accessories. A shortage pushes staff towards damaged garments or mixed design generations.
6. When a fabric, button, trim, or embroidery is discontinued, replace the complete visible outfit at that desk rather than combining one near-match component with older pieces. Transferable badges must be removed, checked, and reattached at the specified position.
Related products
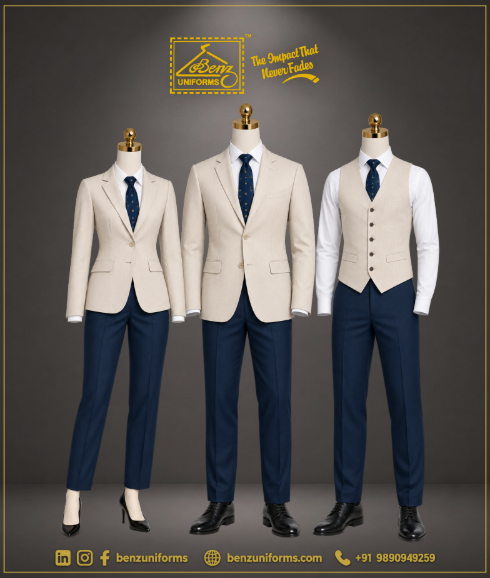 | Front Desk Uniforms Benz Uniforms: Elegant Front Office & Reception Uniforms to Make a Stunning First Impression First impressions are everything. View product → |
 | FRONT DESK The Impact That Never Fades Elevate Your First Impression with Premium Front Desk Uniforms At Benz Uniforms, we know that your front desk team is the... View product → |
Frequently asked questions
What does front office uniform maintenance preserve besides appearance?
It preserves the approved cut, fit, colours, trims, branding and consistent recognition of reception staff.
How often should hotel reception uniforms be inspected?
Inspect each uniform before every shift, then complete a more detailed scheduled check for fit, wear, stains, trims and branding.
How should front desk uniform components be cleaned and finished?
Follow each garment’s care label, use the correct washing method, dry it as directed and press it at the permitted temperature.
When should a hotel repair or replace a reception uniform?
Repair loose buttons, seams and trims when the garment remains structurally sound; replace it when wear or repeated repairs alter its fit, colour or design.